30 Oct 2015

Lightwatch : An IOT prototype using XMPP and Android

In two earlier posts, we have shown how to build (a) an XMPP chat client in Python that can listen for incoming messages and, where applicable, store the data in an SQLite database and (b) a XMPP chat client for Android that can transmit data from an Android device. With these two components we are now in a position to build a realistic prototype of an IOT system that will continuously transmit information about ambient light conditions from an Android device.

This prototype will demonstrate all the essential components of an IOT system namely
  • A  physical sensor - in this the light sensor built into an Android device that measures the lux intensity of ambient light
  • A central message broking service -- in this case an Ignite Openfire server that runs an XMPP protocol based messaging service. This is commonly known as an Instant Messaging or Chat server. XMPP is one of the standard protocols used in IOT.
  • A way to securely pass information across multiple devices. Security is established through the userid and password of the logged in users
  • A SQL compliant RDBMS that receives the light intensity data and stores it for future processing.
[ What is IOT ? Ooops ... sorry, please check out this or this :-) to understand why we are doing any of this ! ]

The overall architecture is as follows :


Any Android device has a set of physical sensors, that can be accessed from a program and these can be identified through any standard utility app, like Sensor Box. In this example, we build a sensor app that accesses the light sensor, one of the most widely available sensors, to determine the level of ambient light near the device.

The sensor app opens an XMPP chat dialogue with a controller device, which is any device that supports a generic XMPP chat client, and waits for a signal to transmit data. Once this signal is received, the sensor app opens a second XMPP chat dialogue with the Python listener and keeps sending ambient light data every 5 seconds, in the format that the listener will accept and store in the SQLite database. This continues until the controller device sends a hold signal, when the data transmission is paused. The transmission can be resumed or paused as and when required. Finally, when the controller sends a quit message, the sensor app shuts down.

To build this app, we broadly follow the instructions given in the earlier post on how to build an XMPP chat client for Android. In addition, the code to handle the light sensor is adapted from this page. In this case, the application is called LightWatch and the key files that need to be changed / modified are as follows 
  1. src/org/iothub/lightwatch/LightWatch.java
  2. res/layout/activity_light_watch.xml
  3. res/values/strings.xml
  4. res/drawable/iothub0.9.png
  5. AndroidManifest.xml
All these files are available in GitHub

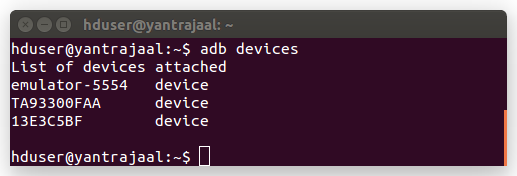
To test out the application we need three Internet connected devices
  1. A Unix machine running the ChatIOT.py application as described in this post. This needs to be started with a XMPP userid / password [ referred to as the ReporterID in the LightWatch.java file]
  2. A controller device (Android, Unix, Windows whatever ) that has a chat client that is logged in with another XMPP userid / password [ referred to as the Controller ID]
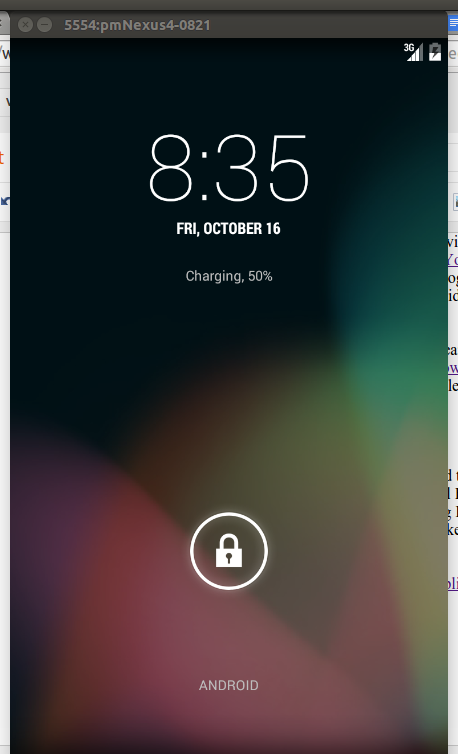
  3. An Android device where the LightWatch application is installed. This application needs a third userid / password.
All three userids should be in the same XMPP server, which in our case is adastra.re and should be defined as each others chat "contacts". Otherwise messages will never be delivered or accepted.

If everything works well, the sensor app will send a message to the controller device announcing its presence. From the controller device, the message "xmit" needs to be sent back. This will initiate the transmission of a set of messages like "PUSH <lux value>" to the data store. The data store should accept these and store them in the SQLite database. If you cover the Android device with the LightWatch app with a piece of paper, you will notice a sharp fall in the lux value that is being transmitted. This was the humble goal of this application.

Everything has been tested on a Motorola phone and an Xioami tablet and it all works. 


One problem that happens is when the LightWatch gets paused, the flow of data stops! To overcome this, the app was redesigned with the bulk of the activity migrated into an Android Service. This is the LightWatch2 application that can be built with the following files -- that are available in Github. [ Actually, the entire project itself can be downloaded from here.]
  1. src/org/iothub/lightwatch/LightWatch2.java
  2. src/org/iothub/lightwatch/LightWatchService.java
  3. res/layout/activity_light_watch2.xml
  4. res/values/strings.xml
  5. res/drawable/iothub0.9.png
  6. AndroidManifest.xml
  7. res/drawable/pmbutton.xml
Both the applications work very similarly except that in the case of LightWatch2, the service has to started and stopped by pressing buttons on the main screen. After that the behaviour is similar to the LightWatch.

Building a trivial app for Android is easy but one that involves using XMPP libraries and accessing sensor data is a little more complicated. The initial effort required in setting up the process is significant, but once this done, the rest follows relatively smoothly. If you want to set up a small IOT system that is described here, follow the sequence of posts given in this blog.

  1. Build the python chat listener - chatiot.py
  2. Set up your Eclipse environment for Android
  3. Build a basic XMPP client app for Android
  4. Then do what is explained in this blog!
Where can this technology be used ?

One obvious application is in smart cities, where we can measure parameters like air pollution on a continuous basis using tools like Aircast as explained in this blog post.

17 Oct 2015

DIY IOT - XMPP Chat client for Android

In an earlier blog post we had explained how a public XMPP chat server can be used to transmit messages between two computers. In that post we had shown how we can build a chatbot listener in Python that waits for messages and when messages arrive, there was a some simple logic that allowed it to either ring an alarm ( sound a bell tone) or insert the data into an SQLite database.

This chatbot -- ChatIOT -- was tested  by sending messages from a Xabber, a free XMPP chat client using two userids registered on a free, public XMPP server available at adastra.re. This post shows how to build a basic XMPP client for Android, from scratch, using Java and the Smack XMPP library from the Openfire opensource project.

Non-trivial Android app development is not for the faint hearted. If one has never developed an Android application in the past, it would be good idea to look through this post Building an Android App -- Getting Started.

Start Eclipse and create a new Android project with the following parameters :

Use the default options on the next couple of screens and then choose the template for Blank Activity


Click through the rest of screens until the project is created and is visible on the Package Explorer panel on the left of the Eclipse Screen.

Two files would have been opened in the Editor panel, but if not, open the file ChatIOT > res > layout > activity_main.xml Replace the contents of the file with the following code :
activity_main.xml

<RelativeLayout xmlns:android="http://schemas.android.com/apk/res/android"
   xmlns:tools="http://schemas.android.com/tools" android:layout_width="match_parent"
   android:layout_height="match_parent" android:paddingLeft="@dimen/activity_horizontal_margin"
   android:paddingRight="@dimen/activity_horizontal_margin"
   android:paddingTop="@dimen/activity_vertical_margin"
   android:paddingBottom="@dimen/activity_vertical_margin" tools:context=".MainActivity">
   
   <TextView
      android:id="@+id/textView1"
      android:layout_width="wrap_content"
      android:layout_height="wrap_content"
      android:text="@string/Heading1text"
      android:layout_alignParentTop="true"
      android:textColor="#104E8B"
      android:layout_centerHorizontal="true"
      android:textSize="30dp" />
   
   <ImageButton
        android:id="@+id/imageButton"
        android:layout_width="wrap_content"
        android:layout_height="wrap_content"
        android:layout_below="@+id/textView1"
        android:layout_marginTop="15dp"
        android:layout_marginBottom="30dp"
        android:layout_centerHorizontal="true"
        android:src="@drawable/iotlogo_v1" />
   
   <Button
        android:id="@+id/button1"
        android:layout_width="120dp"
        android:layout_height="wrap_content"
        android:layout_below="@+id/imageButton"
        android:onClick="startCon"
        android:layout_marginBottom="10dp"
        android:layout_centerHorizontal="true"
        android:background="@drawable/pmbutton"
        android:text="@string/button1text" />
   
    <Button
        android:id="@+id/button2"
        android:layout_width="120dp"
        android:layout_height="wrap_content"
        android:layout_below="@+id/button1"
        android:layout_marginBottom="10dp"
        android:layout_centerHorizontal="true"
        android:onClick="pushData"
        android:background="@drawable/pmbutton"
        android:text="@string/button2text" />
    
    <Button
        android:id="@+id/button3"
        android:layout_width="120dp"
        android:layout_height="wrap_content"
        android:layout_below="@+id/button2"
        android:layout_marginBottom="10dp"
        android:layout_centerHorizontal="true"
        android:onClick="stopCon"
        android:background="@drawable/pmbutton"
        android:text="@string/button3text" />
    
    <TextView
         android:id="@+id/textView2"
         android:layout_width="wrap_content"
         android:layout_height="wrap_content"
         android:text="@string/Heading2text"
         android:textColor="#104E8B"
         android:textSize="20dp"
         android:layout_below="@+id/button3"
         android:layout_centerHorizontal="true"
         android:layout_marginBottom="40dp" />

</RelativeLayout>


This will show many errors because many of the required resources, artifacts are still missing.

Next, open the file ChatIOT > res > values > strings.xml and replace the contents with this code
strings.xml

<?xml version="1.0" encoding="utf-8"?>
<resources>

    <string name="app_name">ChatIOT</string>
    <string name="action_settings">Settings</string>
    <string name="button1text">Connect</string>
    <string name="button2text">Send</string>
    <string name="button3text">Disconnect</string>
    <string name="Heading2text">xmpp chat for IOT</string>
    <string name="Heading1text">chatIOT</string>

</resources>


Create a new folder in ChatIOT > res and name it drawable. Inside this folder, create new, empty file called ChatIOT > res > drawable > pmbutton.xml. Replace the default contents of the file with the following code :

pmbutton.xml

<?xml version="1.0" encoding="utf-8"?>
<selector xmlns:android="http://schemas.android.com/apk/res/android" >
 <item android:state_pressed="true" >
     <shape android:shape="rectangle"  >
         <corners android:radius="3dip" />
         <stroke android:width="1dip" android:color="#5e7974" />
         <gradient android:angle="-90" android:startColor="#345953" android:endColor="#689a92"  />            
     </shape>
 </item>
<item android:state_focused="true">
     <shape android:shape="rectangle"  >
         <corners android:radius="3dip" />
         <stroke android:width="1dip" android:color="#5e7974" />
         <solid android:color="#58857e"/>       
     </shape>
 </item>  
<item >
    <shape android:shape="rectangle"  >
         <corners android:radius="3dip" />
         <stroke android:width="1dip" android:color="#5e7974" />
         <gradient android:angle="-90" android:startColor="#8dbab3" android:endColor="#58857e" />            
     </shape>
 </item>
</selector>


Finally download this 9.png image file
and store it in the folder ChatIOT > res > drawable-hdpi with the name iotlogo_v1.9.png Make sure that all files have been saved, then right click on project ChatIOT and press Refresh. After this the layout should be free of errors, though there will be some warnings.  The screen will now look like this :


Open the MainActivity.java file located in ChatIOT > src > com.yantrajaal.chatiot > MainActivity.java and replace the contents of file with the following code :

MainActivity.java

package com.yantrajaal.chatiot;

import java.io.IOException;

import android.app.Activity;
import android.os.AsyncTask;
import android.os.Bundle;

import android.util.Log;
import android.view.View;
import android.widget.Toast;
// Smack libraries 
import org.jivesoftware.smack.SmackConfiguration;
import org.jivesoftware.smack.SmackException.NotConnectedException;
import org.jivesoftware.smack.chat.ChatManager;
import org.jivesoftware.smack.chat.Chat;
import org.jivesoftware.smack.chat.ChatMessageListener;
import org.jivesoftware.smack.AbstractXMPPConnection;
import org.jivesoftware.smack.SmackException;
import org.jivesoftware.smack.XMPPException;
import org.jivesoftware.smack.packet.Message;
import org.jivesoftware.smack.tcp.XMPPTCPConnection;
import org.jivesoftware.smack.tcp.XMPPTCPConnectionConfiguration;

import java.util.Random; // required for Random Number Generation

public class MainActivity extends Activity {
 String msg = "PM1139 : ";
 
 XMPPTCPConnectionConfiguration configChatIOT = XMPPTCPConnectionConfiguration.builder()
            .setUsernameAndPassword("uid2", "password2")
            .setServiceName("adastra.re")
            .setHost("adastra.re")
            .setPort(5222)
            .setResource("chatIOT")
            .build();
    
    AbstractXMPPConnection conxChatIOT = new XMPPTCPConnection(configChatIOT);
 /** Called when the activity is first created. **/
 
 @Override
    public void onCreate(Bundle savedInstanceState) {
       super.onCreate(savedInstanceState);
       setContentView(R.layout.activity_main);
       SmackConfiguration.setDefaultPacketReplyTimeout(10000);
       Log.d(msg, "The onCreate() event");
    }

 private class pmConnect extends AsyncTask<Void, Void, Void> {
      protected Void doInBackground(Void...dummy) {
       
       try {
        conxChatIOT.connect();
        conxChatIOT.login();
    } catch (SmackException | IOException | XMPPException e) {
     // TODO Auto-generated catch block
     e.printStackTrace();
    } 
         return null;
      }
/*
// this piece of code is kept just for the sake of completeness of Async Tasks
      protected void onProgressUpdate(Void...progress) {
         // setProgressPercent(progress[0]);
      }

      protected void onPostExecute(Void...result) {
          //showDialog("Downloaded  bytes");
      }
*/
  }
 private class pmSend extends AsyncTask<Void, Void, Void> {
      protected Void doInBackground(Void...dummy) {
       Random randomGenerator = new Random();
       int pseudoSensorData;
        
   // Assume we've created an XMPPConnection name "conxChatIOT"._
    ChatManager chatmanager = ChatManager.getInstanceFor(conxChatIOT);
    
    Chat ChatIOT = chatmanager.createChat("uid3@adastra.re", new ChatMessageListener() {
     public void processMessage(Chat chat, Message message) {
      System.out.println("Received message: " + message);
     }
    });
    
    for(int i=0 ; i < 4 ; i++)
    {
        
     try {
      if (i==0){
       ChatIOT.sendMessage("Sound 2");
      } else {
      // this data needs to be generated from some Android physical sensor
       // instead of using a random number generator
       pseudoSensorData = randomGenerator.nextInt(100);
       String payLoad = "Push " + String.valueOf(pseudoSensorData);
      ChatIOT.sendMessage(payLoad);
      }
    } catch (NotConnectedException e1) {
     // TODO Auto-generated catch block
     e1.printStackTrace();
    }
     try {
         Thread.sleep(5000);                 //1000 milliseconds is one second.
     } catch(InterruptedException ex) {
         Thread.currentThread().interrupt();
     }
    }
         return null;
      }

  }
 
    //Method to start the Connection
    public void startCon(View view) {
     Toast.makeText(this, "Connecting", Toast.LENGTH_LONG).show();
     new pmConnect ().execute();
    }
    
  //Method to start the Connection
    public void pushData(View view) {
     Toast.makeText(this, "Push Data", Toast.LENGTH_LONG).show();
     new pmSend ().execute();
    }
    
  //Method to Quit 
    public void stopCon(View View) {
     Toast.makeText(this, "Disconnection", Toast.LENGTH_LONG).show();
     conxChatIOT.disconnect(); 
    }
  
}


This will immediately, throw lots and lots of errors because the Smack/XMPP libraries have not been loaded as yet. To get the libraries perform the following steps 

1. Go to the Smack 4.1 Readme and Upgrade Guide and go to the part for Using Eclipses Android Development Tools (ADT) Ant Based Build
2. Download a python script getMavenArtifactsNG.py  This is in Python 3. Hopefully you have that!
3. Create an artifacts.csv file with the text information given in the paragraph
4. Execute the command ./getMavenArtifactsNG.py -f artifacts.csv -p <path_to_Eclipse_Workspace_Directory>/ChatIOT which is the project directory. This will populate the libs and libs-sources directory with a zooful of jar files!

Refresh the project and this will remove all errors EXCEPT on the lines that refer to the ChatManager. For some reason, the script given above does not load the smack-IM libraries!

5. Go to the downloads section of the Smack library and download the smack-4.1.4.zip file. Unzip this file, locate ONE file smack-im-4.1.4.jar and copy it into ChatIOT/libs directory.

This should remove all compile time errors.

Finally, open the AndroidManifest.xml file located in the ChatIOT project folder and insert one line on permission to access the Internet :
AndroidManifest.xml

<?xml version="1.0" encoding="utf-8"?>
<manifest xmlns:android="http://schemas.android.com/apk/res/android"
    package="com.yantrajaal.chatiot"
    android:versionCode="1"
    android:versionName="1.0" >

    <uses-sdk
        android:minSdkVersion="19"
        android:targetSdkVersion="19" />

    <uses-permission android:name="android.permission.INTERNET" />
    
    <application
        android:allowBackup="true"
        android:icon="@drawable/ic_launcher"
        android:label="@string/app_name"
        android:theme="@style/AppTheme" >
        <activity
            android:name=".MainActivity"
            android:label="@string/app_name" >
            <intent-filter>
                <action android:name="android.intent.action.MAIN" />

                <category android:name="android.intent.category.LAUNCHER" />
            </intent-filter>
        </activity>
    </application>

</manifest>


Now if the MainActivity.java program is Run as an Android Application, it should show up on the Emulator like this :

To test the program we need to do the following tasks

  1. This test assumes that we have two registered userid at the xmpp server adastra.re.  So create two IDs say uid2 and uid3. In principle you can choose any public XMPP server but this program has been tested at AdAstra.
  2. Set up the ChatIOT listener chatbot by following these instructions and and start the chatbot using the uid3 userid and its corresponding password.
  3. Start the ChatIOT app either in the Emulator or in a physical Android device
  4. Press the Connect button -- this will connect to the AdAstra server and login as uid2
  5. Press the Send button -- this will first send a message to the listener that contains the text "SOUND 2". This will cause an alarm sound. Next it will send three messages consisting of the word PUSH followed by a random number. These three random numbers would be stored in the SQLite database on the listener machine. There will be a 5 second gap between the messages
  6. The Send button can be pressed repeatedly.
  7. The Disconnect button will cause a logout.
  8. Finally for uid2 to be able to send a message to uid3, the two users must be in each others contact lists! Please use a standard IM client like Pidgin or Xabber to first establish this contact. Otherwise no message will ever be relayed.
  9. You may be wondering why we have used uid2, uid3 as users. Actually there is another user uid1 through which we can keep a check on when uid2 and uid3 are logged in and able to communicate.
In this program we are simply transmitting numbers generated at random. In a real IOT case, these numbers will be generated by physical sensors connected to the Android device. [ this is explained in a subsequent post, where we see how to sense and report illumination levels ]

Java programming on Eclipse is a treacherous business because more often than not the libraries cannot be located and loaded. With Android and Smack there is another level of complexity. Hopefully the steps given here will work. If there is a problem, you can always download the entire project from GitHub, with all libraries in place, and import the same into Eclipse.


16 Oct 2015

Android Programming with Eclipse & Java - Tutorial

In an earlier post we had shown how a generic XMPP chat client (Xabber), running on an Android machine could be used as an IOT component to transmit data and commands, through a publicly hosted XMPP chat server, that can be stored or executed on a distant machine that hosts a python chatbot listener program.

However for any meaningful IOT task to be performed, we need a custom built XMPP chat client that will pick up up data from sensors and transmit it to the listener program. This would be a rather minimal XMPP client, without the bells and whistles required for a full fledged interactive chat client. All that it needs to do is to connect to a XMPP server, login with its userid/password credentials and transmit a IM message to the chatbot listener. Such a program for the Android program needs to be written in Java but BEFORE you begin typing "public static void main(string args) ...etc" you need to get your machine ready for Android programming ...

and believe me, that is not for the faint hearted!

However, don't panic! do not lose heart. I did it and so can you!

There are many tools that will help you build Android apps very quickly using a browser based GUI with drag and drop tools. One such is the AppInventor from MIT for which a decent tutorial is available in the StudyTonight website. Using this, you can build nice, quirky apps that will amuse your friends and give you bragging rights for being an Android developer. But these are just for toys. If you want do serious stuff, you need to go through what we are about to describe in this post.

First question, would you want to work in Windows or Linux ?

Most hardcore application developers, particularly the geeky nerds, prefer working with Linux. My machine has dual boot configuration with one Windows 7 partition and one Ubuntu 14.04 partition and I do most of my development in Ubuntu. However from Windows 8 onwards, dual boot is very difficult if not impossible. So the only option would be download the Oracle VirtualBox software into your Windows machine and install a free Ubuntu image by following instructions given on this page.

All this assumes that you want to develop on Linux. If you prefer the Windows platform then this post may not be relevant for you, except for pure academic interest.

The next decision is about which IDE ( Integrated Development Environment ) to use. Google offers the Android Studio that you can download and then you can Build Your First App by following the instructions. I went down this path and built my first HelloWorld program but realized that most people prefer the Eclipse option and so most of the samples and examples are based on Eclipse. Hence I also abandoned the Android Studio and joined the Eclipse bandwagon. Going forward, we shall stick to the Eclipse option.

I had already installed Eclipse v 3.8 on my Ubuntu partition for an earlier Hadoop project and so it was already there on my machine. However you may read about How to Install Latest Eclipse on Ubuntu by searching for the same on Google. Once Eclipse is installed it may be a good idea to write and run a Hello World program in Java/Eclipse. Just to make sure that things are good to go.

Now for the real stuff -- Java for Android on Eclipse!

First make sure that your development environment is adequate, and then set up the Android SDK. There are four tasks here, namely (a) Download the SDK, (b) Install Eclipse -- not necessary if you already have Eclipse, (c) Setup the Android Development Tool Plug In and (d) Create an Android Virtual device for you to test your Android Apps -- all of which are explained in the link given above. This download takes a while, read every screen carefully and generally go with the defaults.

Now you may go over and create your first hello world Android application. Do not forget to check out the various other excellent tutorials on the left side-bar.

If everything goes well, you will see the Android Virtual Device being launched. It will look like any Android phone and you can click on the usual Android buttons and even browse the web or take pictures with it -- if you have configured it correctly. For the Hello World program, the sequence of screens will look like this.


Our application name is HelloWorld0851 ( located in the third row, right side) and when clicked it shows a little fragment of text "Namaskar 0851 Emulator".

If at this point, you go to the Linux terminal and run the command the Android Device Bridge (adb) command  >adb devices.

We will see only one Android Devices Connected to the machine -- this is the Emulator


Now we need to move from the Simulator to some real Android devices and I connect my Motorola Phone and Micromax Xiaomi tablet to the USB ports of the laptop. When connected, these devices show up on the adb command as follows:


The TA is the Motorola device and the 13E is the Micromax device. Now when you execute the HelloWorld program, you will be prompted to choose the device where it will be installed and run.

So are we done ? Well, I wish I could say so ... but NO,  it is not very easy for the external devices to get connected to the Eclipse development environment.

So how do you connect an Android device to the Eclipse Development Environment ?

Step 1 : USB debugging mode.

When an Android device is connected to the USB port of a computer it is usually in the "media mode" that means that you can only transfer files (including .APK ). For serious work, the machine needs to be put in USB debug mode. Usually, the USB debug mode is hidden from lay users and has be discovered and activated and the process is different for each version of Android.

For the Motorola phone  running Android 5.1 you need to go to :
Settings > About Phone > Build Number and press it 7 times.

For the Micromax Tablet running Android 4.4.4 you need to go to
Settings > About Pad > MIUI version and press 7 times

This is "Khulja Sim Sim" to the Alladin's cave of Android development and a new option called Developer Options will appear on Settings menu and within this there will be another option called USB debug mode. Both Developer Options and USB debug mode needs to be activated. When you do this for the first time, there may be a security warning and  you need to accept the warning and allow the process to move forward. Denying the request will put your device in the limbo as far as application development is concerned.

For the specific device that you are using, you will have to Google for the steps involved or arrive their by trial and error!

In many cases, this is adequate. One needs to stop, restart the adb service by simply
>sudo adb kill-server
>sudo adb start-server
and hopefully the device will be detected.

But very often than not, this is not enough. Even after activating USB debug mode, the device may not be recognized. So now

Step 2 : Android-Rules

You need to create a file called 51-android-rules in the /etc/udev/rules.d directory as described in this post How to fix ADB no permissions, and explained in context in Stackoverflow. This will solve the problem for most common Android vendors, including Motorola, but unfortunately that does not include Micromax!

To identify the ID of the USB connected Micromax device, we executed the lsusb command :

This shows the ID of the various devices connected to the USB ports, most of which are recognizable from the descriptions.

For example ID 22b8-2382 is the Motorola Device and it is duly visible in the original file that we downloaded. So the there is a good chance that the unknown device with ID 271-066B must be the Micromax device. So we append on extra dummy line at the bottom of the 51-android-rules file with one extra line

SUBSYSTEM=="usb", ATTRS{idVendor}=="2717", MODE="0666"

and that does the trick! After creating the file with the extra line and executing the commands given in the two posts, both the Android devices are clearly visible with the adb command and are available for testing the application.

Update : My new Micromax Android One running Android 6 was recognised by the Android SDK without any problem. Just set it in USB debugging mode and you are done!

Now we are finally ready!

Go back to Eclipse and run the "MainActivity" java file of the HelloWorld program. There will be a prompt to choose the device which could be any one of the three devices, the emulator, the Motorola phone or the Micromax tablet. Once a physical device is chosen, the application will be installed on the device, started and will also be available like any other downloaded app.

The final hurdle to this happy state of affairs is Android Security does not allow apps to be installed from an unknown source, that is anything other than Google Play. This can be addressed by a simple configuration change that allows App Installs from Unknown Sources.

At the end of all this, we are finally ready to start building a real useful app for the XMPP client. That presents its own set of challenges with the Smack library that connects to the Ignite Openfire server. But that is another post for another day. Keep watching this space!


P.S. If you find this USB debug mode and the Android-Rules to be too much for you, you can always copy the APK file manually into the device while it is connected in the simple media-mode and install it by tapping the file twice in a file browser. See here.